The information in this guide was gathered from the following sources:
1.1 Required Operating System:
- Windows 2008 R2 Enterprise Edition with updates.
1.2 Required Installation Files:
- ActivePerl-5.16.0.1600-MSWin32-x86-295879.msi
- Apache Server - httpd-2.2.22-win32-x86-open-0.9.8tssl.msi
1.3 Additional Information Required:
- SMTP Server Address _____________________________________
- Network Domain Name:___________________________________
- Server Name:____________________________________________
- Web Server Admin Email:__________________________________
- Bugzilla Admin Full Name:_________________________________
- Bugzilla Admin Email Address:______________________________
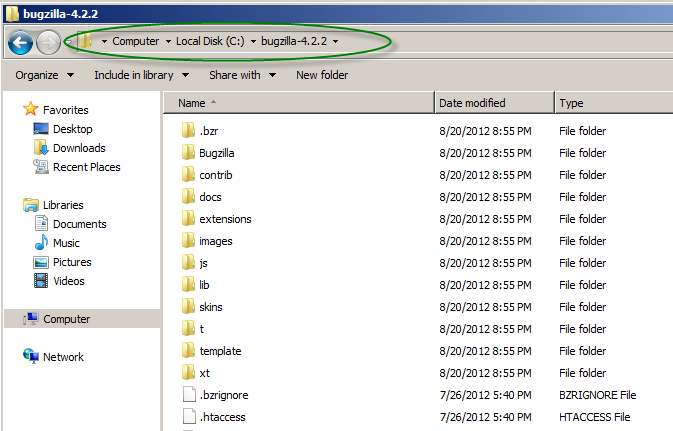
1.4 Extract buzilla-4.2.2.zip file to root of C:\ directory.

2. 0 Install MySQL using msi (mysql-5.5.27-win32.msi)

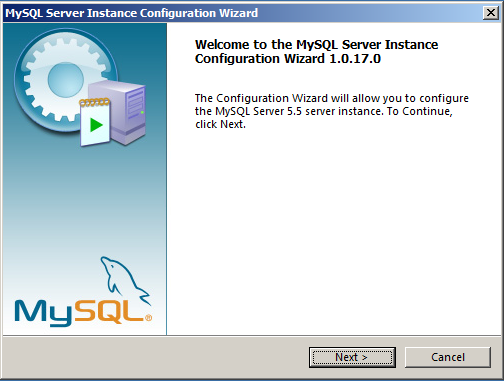
Step 2.1 – Click Next
| 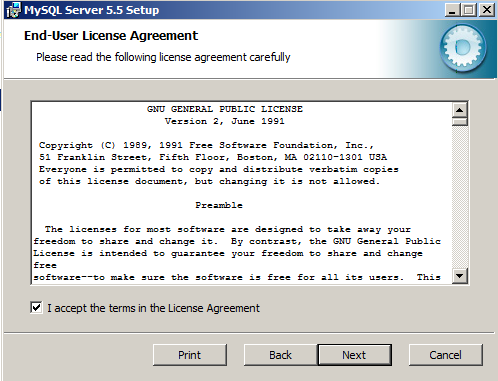
Step 2.2 – Accept and Click Next
|

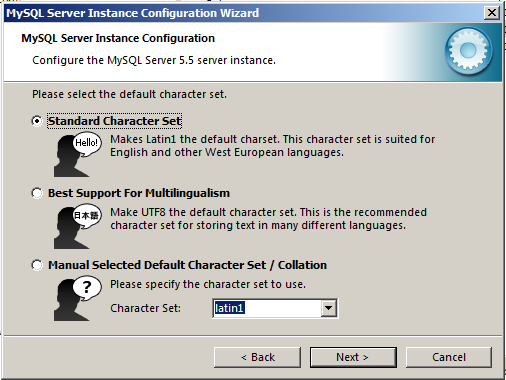
Step 2.3 – Select Typical and Click Next
| 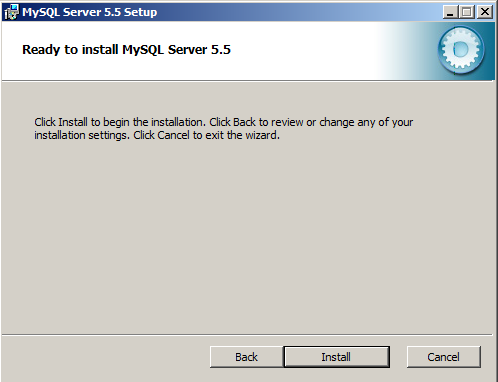
Step 2.4 – Click Install
|

Step 2.5 – Click Next
| 
Step 2.6 - Click Next
|
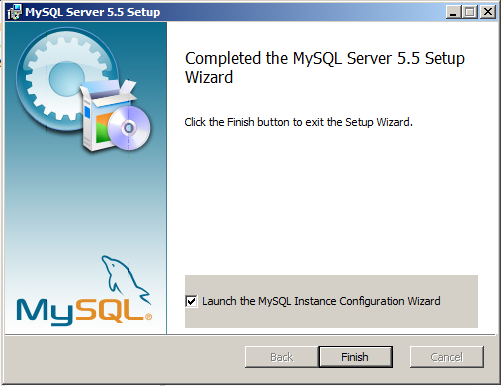
Step 2.7 –Click Finish
| 
Step 2.8 – Click Next
|

Step 2.9 – Click Next
| 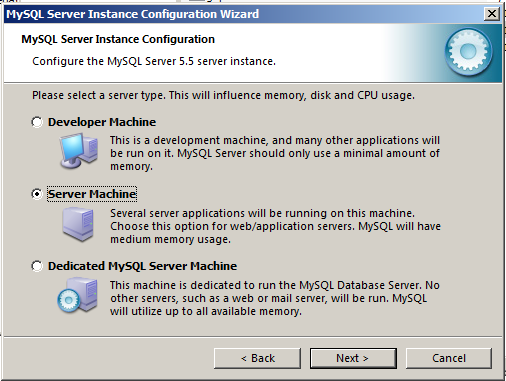
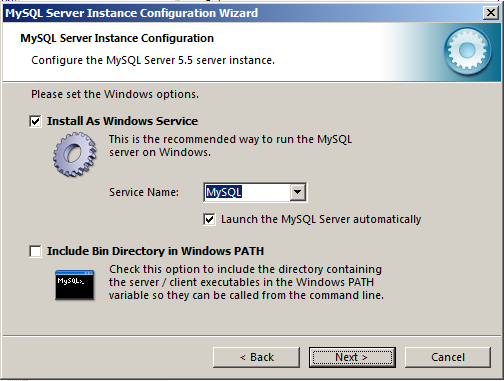
Step 2.10 – Select “Server Machine” and Click Next
|
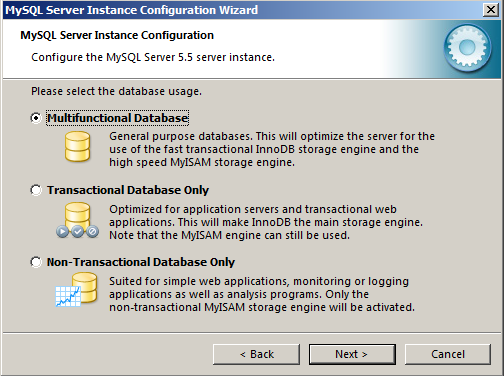
Step 2.11 – Click Next
| 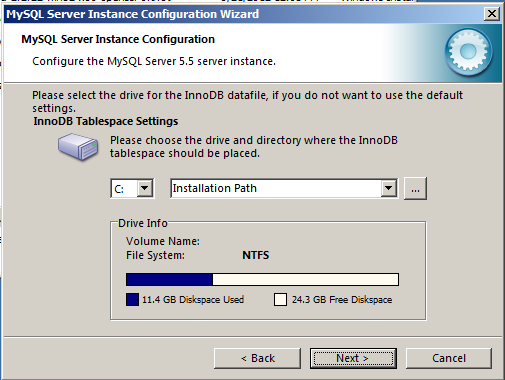
Step 2.12 – Click Next
|

Step 2.13 – Click Next
| 
Step 2.14 - Next
|
Step 2.15 – Click Next
| 
Step 2.16 – Click Next
|

Step 2.17 – Enter “Root Password” & Click Next. Note Password.
| 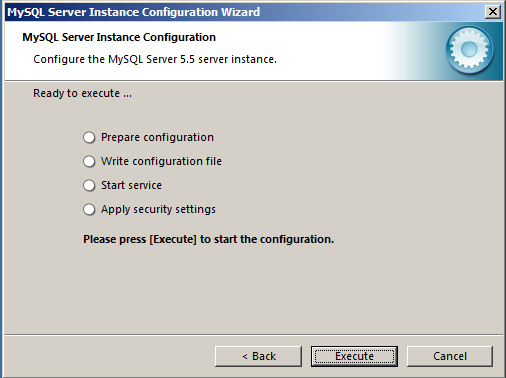
Step 2.18 – Click Execute
|

Step 2.19 – Click Finish
|
Step 2.20 - Note new MySQL root password from Step 2.17 of install. This password will be required later in this guide:______________________________
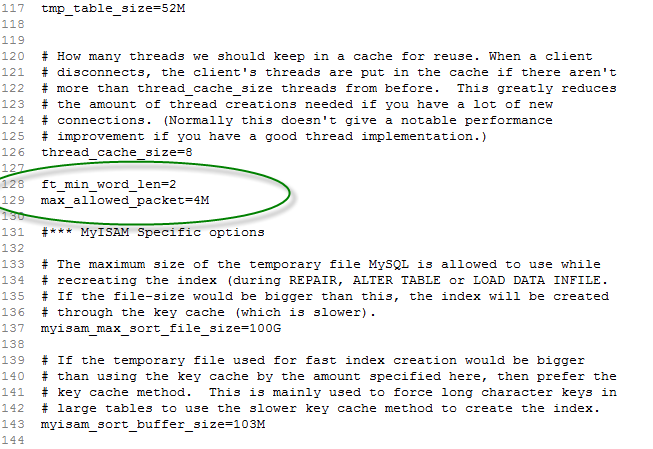
Step 2.21 - Edit “C:\Program Files (x86)\MySQL\MySQL Server 5.5\my.ini” file and add the following to the [mysqld] section:
ft_min_word_len=2
max_allowed_packet=4M
Step 2.20 - Grant privileges to Bugzilla Database User using the MySQL Command Line Client:
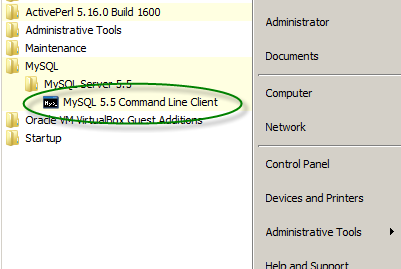

Step 2.22 - Enter MySQL Root password from Step 2.20 and press Enter
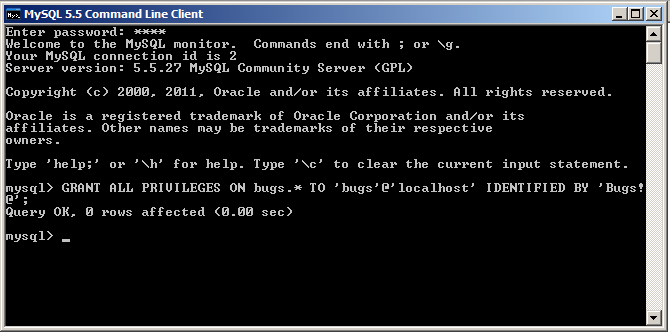
Step 2.23 - Type the following at the “mysql>” prompt and press Enter:
mysql> GRANT ALL PRIVILEGES ON bugs.* TO 'bugs'@'localhost' IDENTIFIED BY 'bugs_password';
Notes: Replace “bug_password” with permanent bugzilla user password. Ensure single quotes are included in string.
Step 2.24 - Make note of the password used for privileges. This will be required for Bugzilla setup:______________________
Step 2.25 - Type quit and Press Enter
mysql> quit
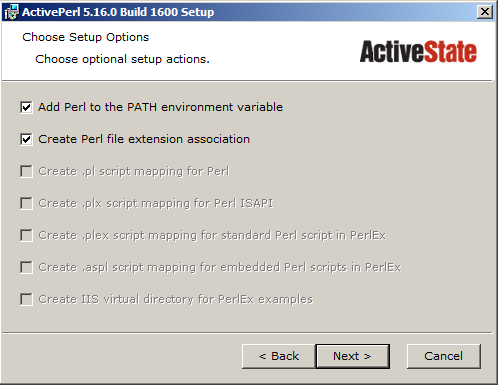
3. 0 Install Perl using msi (ActivePerl-5.16.0.1600-MSWin32-x86-295879.msi).

Step 3.1 - Click Next
| 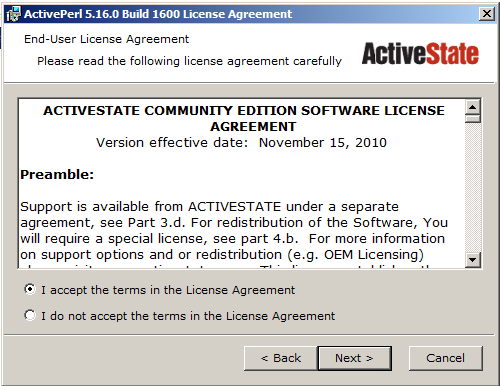
Step 3.2 - Select Accept and Click Next
|

Step 3.3 – Click Next
| 
Step 3.4 – Click Next
|

Step 3.5 – Click Install
| 
Step 3.6 – Click Finish
|
4. 0 Install and update Perl modules using Perl Package Manager (ppm):
Run the following commands at the dos command prompt:
Step 4.1 - C:\>ppm version
Step 4.2 - C:\> ppm upgrade
Step 4.3 - C:\> ppm install MinGW
Step 4.4 - C:\> ppm install AppConfig
Step 4.5 - C:\> ppm install TimeDate
Step 4.6 - C:\> ppm install DBD-mysql
Step 4.7 - C:\> ppm install MailTools
Step 4.8 - C:\> ppm install GD
Step 4.9 - C:\> ppm install GDGraph
Step 4.10 - C:\> ppm install PatchReader
Step 4.11 - C:\> ppm install Net-LDAP-Express
Step 4.12 - C:\> ppm install MIME-tools
Step 4.13 - C:\> ppm install XML-Twig
Step 4.14 - C:\> ppm install RadiusPerl
Step 4.15 - C:\> ppm install SOAP-Lite
Step 4.16 - C:\> ppm install JSON-RPC
Step 4.17 - C:\> ppm install JSON-XS
Step 4.18 - C:\> ppm install HTML-Scrubber
Step 4.19 - C:\> ppm install Email-Send
Step 4.20 - C:\> ppm install Math-Random-ISAAC
Step 4.21 - C:\> ppm install GD-Graph3d
Step 4.22 - C:\> ppm install Chart
Step 4.23 - C:\> ppm install Authen-SASL
Step 4.24 - C:\> ppm install Text-CSV
5.0 Install remaining Perl Modules from CPAN and PPM
Execute the following command from the dos prompt:
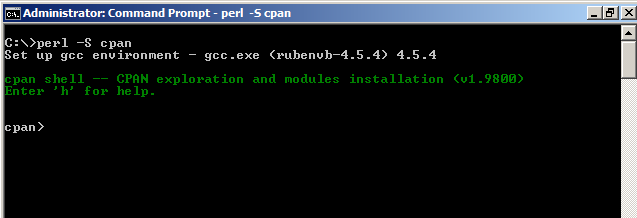
Step 5.1 - C:\>perl –S cpan
Execute the following installations from the “cpan>” prompt:
Step 5.2 - cpan> install DateTime (Answer Yes to all questions)
Step 5.3 - cpan> install Email::MIME
Step 5.4 - cpan> install Template (Answer Y to all questions)
Step 5.5 - cpan> install Template::Plugin::GD
Step 5.6 – cpan> install Encode::Detect
Step 5.7 - cpan> install DBI
Step 5.8 – cpan> quit
Execute the following at the DOS command C:\> prompt:
Step 5.9 - C:\:>ppm install Email-MIME-Attachment-Stripper
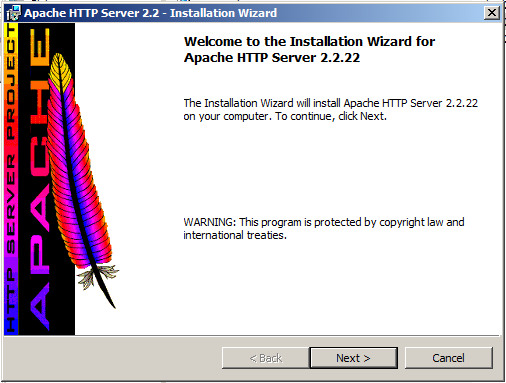
6.0 Install Apache Server using msi (httpd-2.2.22-win32-x86-openssl-0.9.8t.msi).
Step 6.1 – Click Next
| 
Step 6.2 – Click Next
|

Step 6.3 – Click Next
| 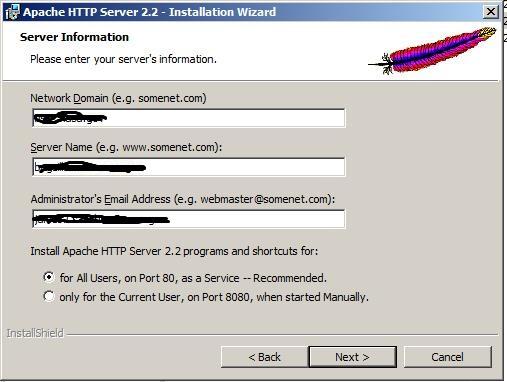
Step 6.4 – Enter Server Info & Click Next
|

Step 6.5 – Click Next
| 
Step 6.6 – Click Next
|
Step 6.7 – Click Next
| 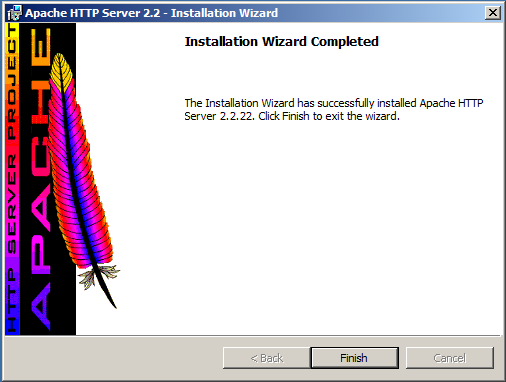
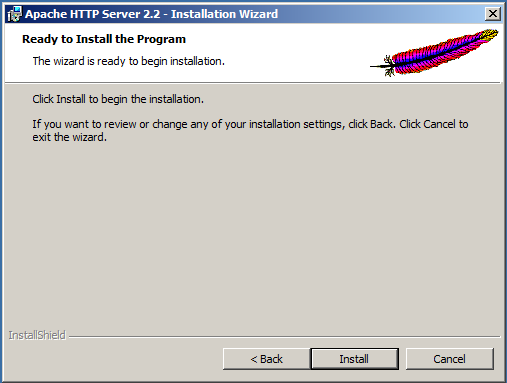
Step 6.8 – Click Finish
|
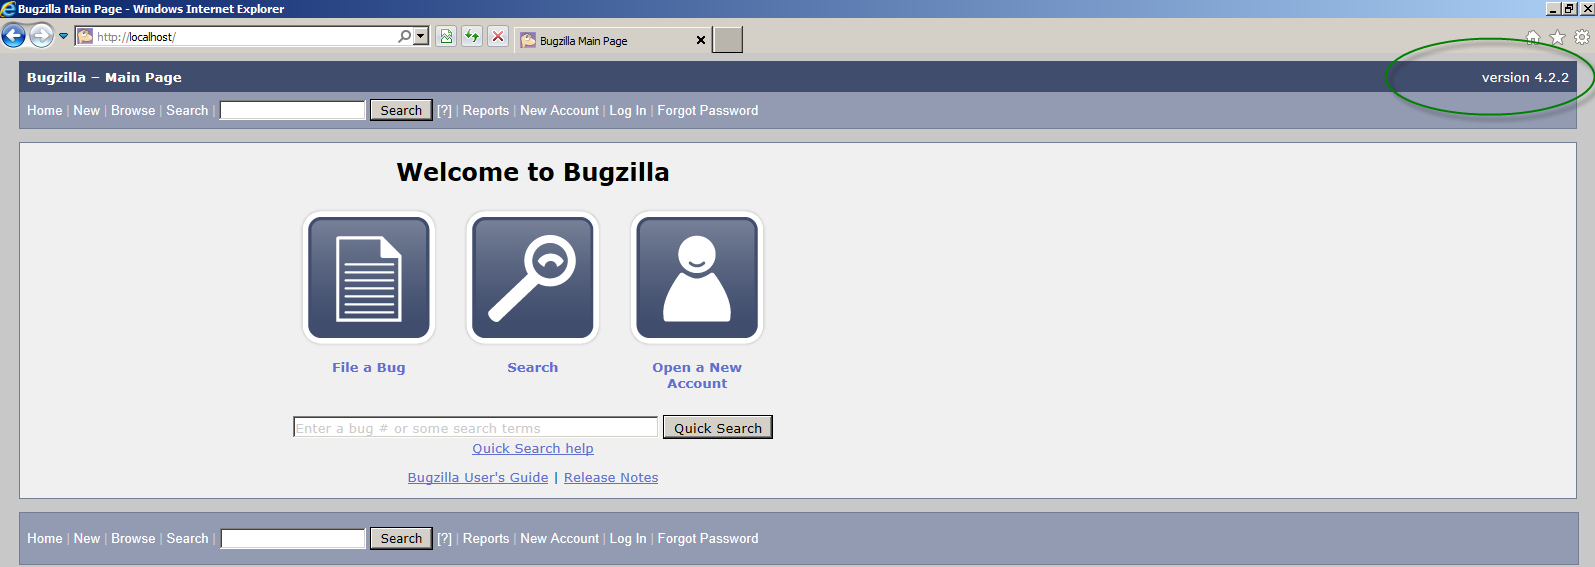
Step 6.9 - Verify Apache installation was successful by opening browser and navigating to http://localhost/
The following should display in the browser:

7.0 Configure Apache Server for Bugzilla Application
Step 7.1 – Edit:
C:\Program Files (x86)\Apache Software Foundation\Apache2.2\conf\httpd.conf
Step 7.2 - Change the DocumentRoot setting to point to C:/bugzilla-4.2.2.
Notes: There are two locations in httpd.conf that need to be updated. You need to use / instead of \ as a path separator.

Step 7.3 - To enable CGI support in Apache, you need to enable the CGI handler, by un-commenting
the AddHandler cgi-script .cgi line.

Step 7.4 - Allow .cgi scripts in the Bugzilla directory by adding the ExecCGI option. We also need to allow Bugzilla's .htaccess file to restrict access to sensitive documents by allowing it to override the defaults. This involves changing AllowOverride None to AllowOverride All. Change to:
#
Options Indexes FollowSymLinks ExecCGI
#
AllowOverride All
Apache also needs to know to use Perl to execute .cgi files, via the ScriptInterpreterSource directive. Add the following:
#
# Tell Apache to use Perl to execute .cgi
#
ScriptInterpreterSource Registry-Strict

Step 7.5 - You also should add index.html.var and index.cgi to the DirectoryIndex list. Change to:
<IfModule dir_module>
DirectoryIndex index.html index.html.var index.cgi
</IfModule>

Step 7.6 - Unless you want to keep statistics on how many hits your Bugzilla install is getting, it's a good idea to disable logging by commenting out the CustomLog directive.

Step 7.7 - Save httpd.conf file
Step 7.8 - In order for ScriptInterpreterSource Registry-Strict to work, you also need to add an entry to the Registry so Apache will use Perl to execute .cgi files.
Use REGEDIT and create a key HKEY_CLASSES_ROOT\.cgi\Shell\ExecCGI\Command with the default data value of the full path of perl.exe with a -T parameter:
C:\Perl\bin\perl.exe -T

Step 7.9 - Restart Apache to pick up the changes.
C:\>net stop apache2.2
The Apache2 service is stopping.
The Apache2 service was stopped successfully.
C:\>net start apache2.2
The Apache2 service is starting.
The Apache2 service was started successfully.
8.0 Configure Bugzilla
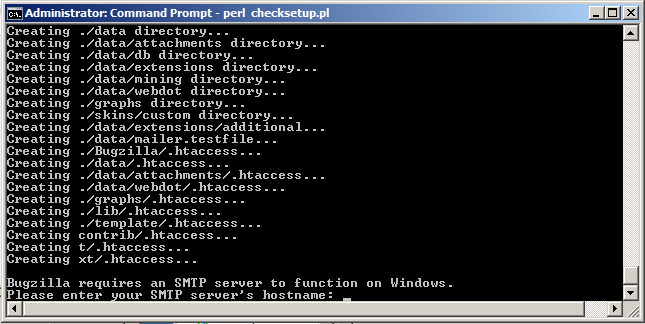
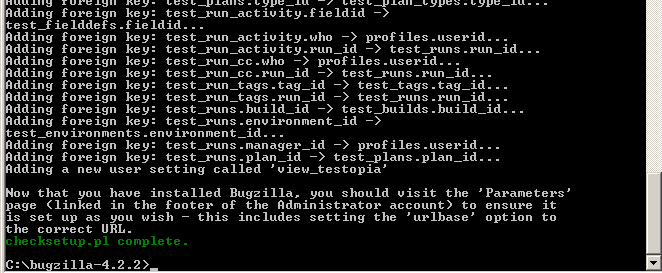
Step 8.1 - Execute checksetup.pl. This will verify the installed perl modules, create the bugzilla data directory, and the bugzilla localconfig file
C:\>cd bugzilla-4.2.2
C:\>bugzilla-4.2.2>perl checksetup.pl

Note: If any mandatory Perl modules are missing you will need to complete installation of these modules before going to the next step.
“perl Checksetup.pl” can be executed until required modules are installed.
Step 8.2 - Edit C:\>bugzilla-4.2.2>localconfig file:
Add DB Password (from Step 2.24) and MySQL Port (3306) to localconfig file.
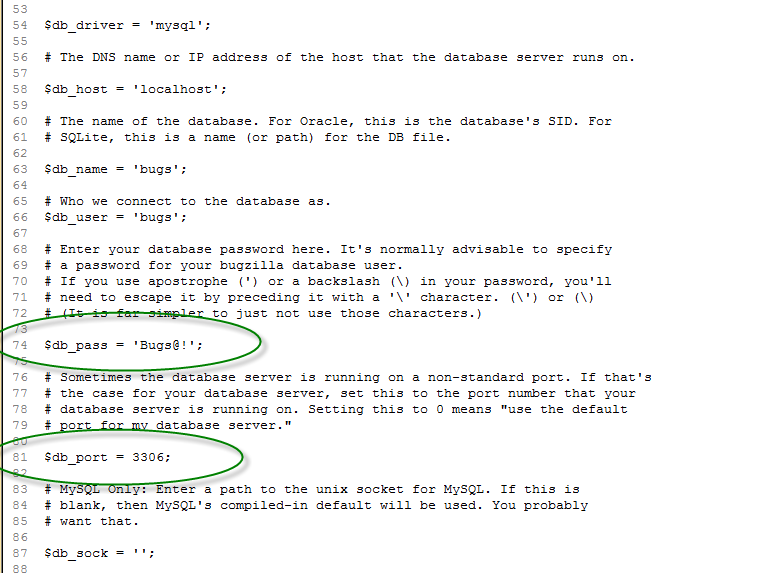
Step 8.3 – Save C:\>bugzilla-4.2.2>localconfig file
Step 8.4 – Execute perl checksetup.pl
C:\>bugzilla-4.2.1>perl checksetup.pl
Step 8.5 – At prompt enter “SMTP server’s hostname”
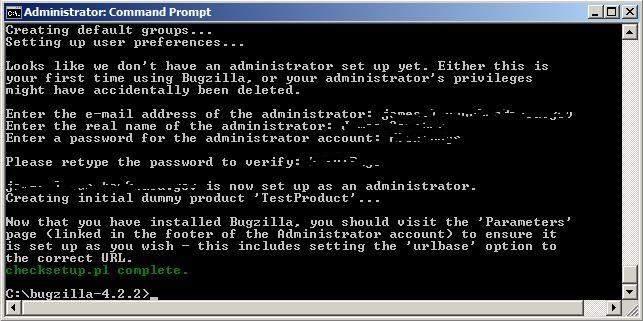
Step 8.6 - Enter email address of Bugzilla admin:__________________________
Step 8.7 - Enter full name of Bugzilla Admin:______________________________
Step 8.8 - Enter password for Bugzilla Admin:_____________________________

Step 8.9 - Retype Password
Step 8.10 - Bugzilla Install is Complete.
Step 8.11 – Scroll through DOS window and verify modules shown above are installed.
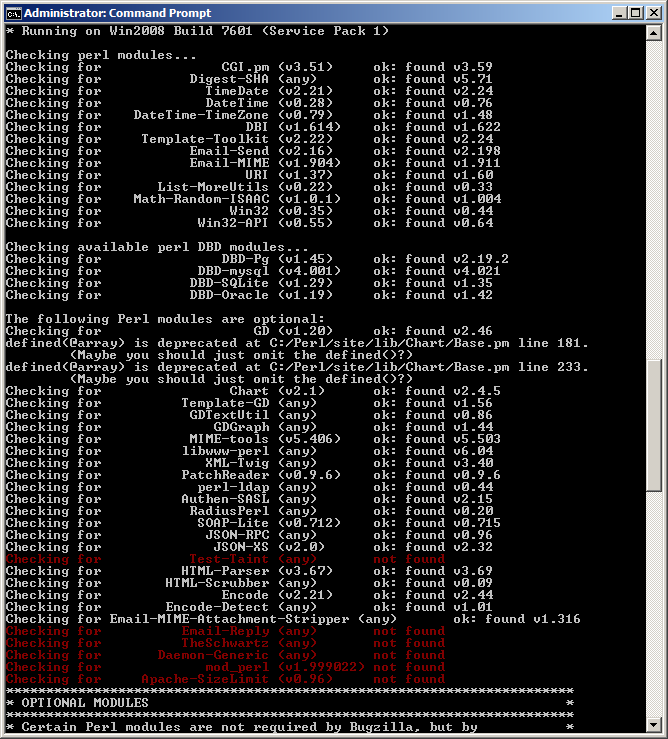
Note: If any modules are missing use the steps in section 4 & 5 to resolve. Continue to execute “perl checksetup.pl” until required modules are verified installed. Disregard the optional modules in red.
9.0 Configure Apache User account
Step 9.1 – Using windows the Windows Computer Management console, create a New User within the Local Users and Groups called “apache_user”.
Check option “Password never expires”.

Step 9.2 - Note the “apache_user” password as it will be required later_______ _________________.
Step 9.3 - Remove apache_user from all groups by clicking the Member Of tab in the apache_user properties panel, select group(s), and clicking Remove.
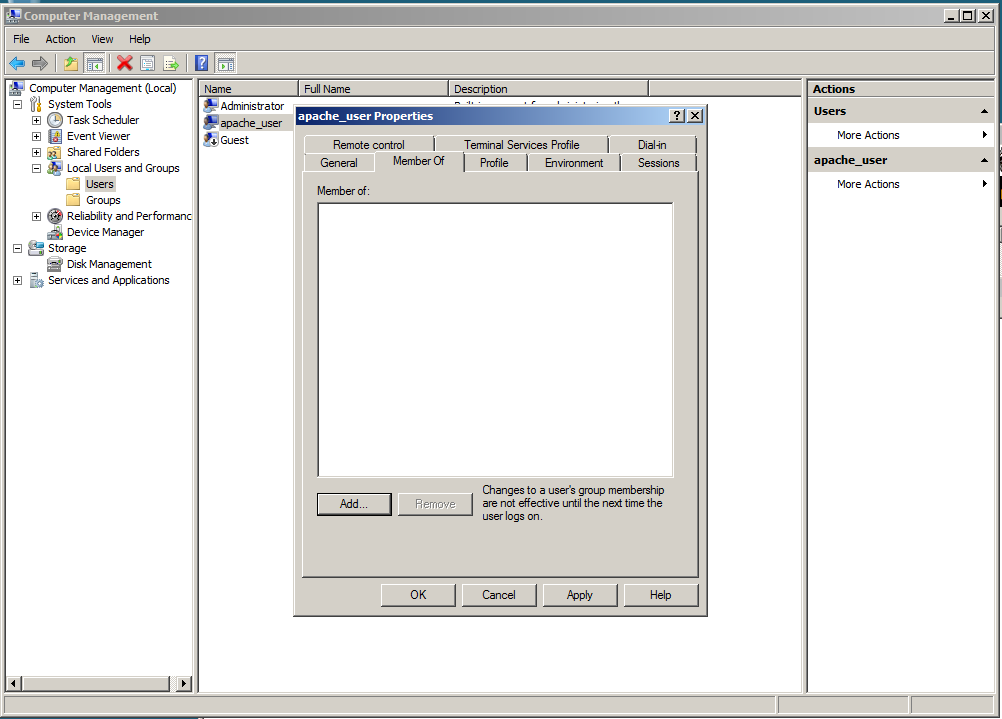
Step 9.4 – Apply changes and close Management Console
Step 9.5 - Grant Apache User Read and Execute permissions to Apache2.2 directory by right clicking on the directory and modifying the Security settings:
C:\Program Files (x86)\Apache Software Foundation\Apache2
C:\Program Files (x86)\Apache Software Foundation\Apache2

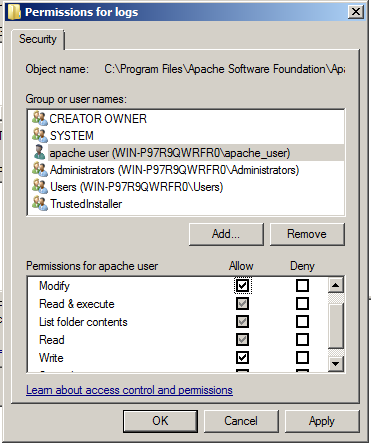
Step 9.5 - Grant Apache User Modify Read Execute Write Access to Apache logs directory:
C:\Program Files (x86)\Apache Software Foundation\Apache2.2\logs
Step 9.6 - Grant Apache User Modify Read Execute Write Access to Temp directory:
C:\Windows\Temp

Step 9.7 Grant Apache User Modify Read Execute Write Access to Bugzilla Data directory:
C:\bugzilla-4.2.2\data

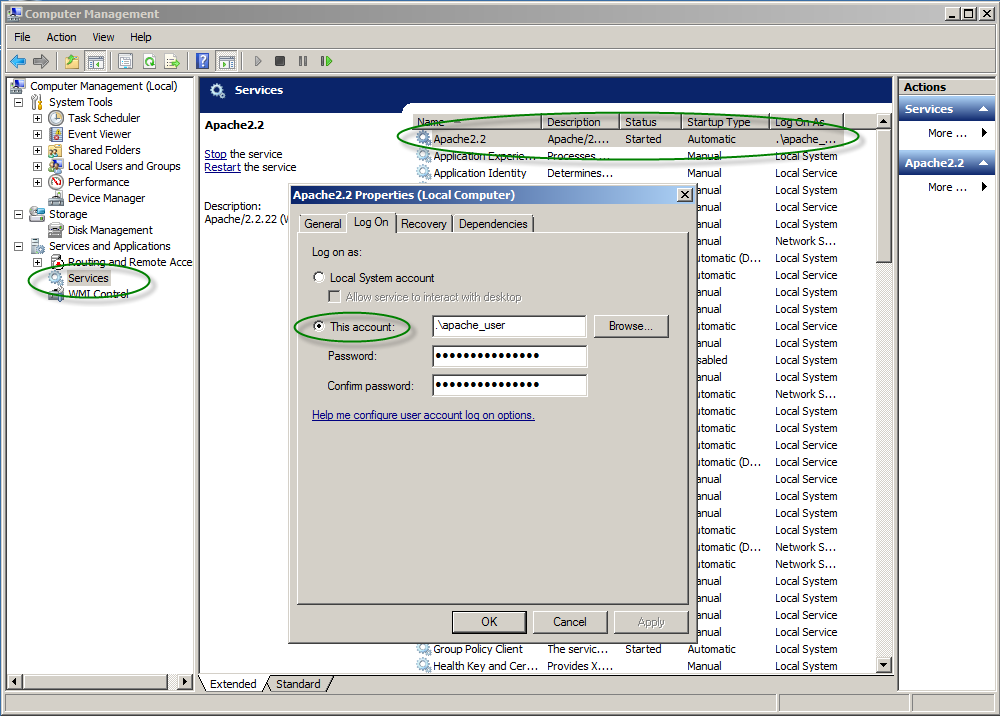
Step 9.8 – Open Windows Computer Management console, configure Apache 2.2 Service to be controlled by “apache_user” account:
Use password from Step 9.2.
Step 9.9 - Restart apache2.2
C:\>net stop apache2.2
The Apache2 service is stopping.
The Apache2 service was stopped successfully.
C:\>net start apache2.2
The Apache2 service is starting.
The Apache2 service was started successfully.
Step 9.10 - Verify Bugzilla is working by navigating to http://localhost/
10.0 Testopia Install
Step 10.1 – Extract testopia-2.5.zip file to Bugzilla Root Directory

Click “Yes” to merge extension directories
After extraction, the Bugzilla root directory will contain additional testopia cgi files (tr_process-name.cgi)
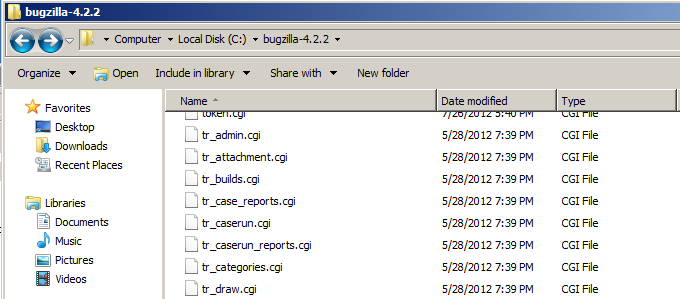
After extraction, the bugzilla “extensions” directory will contain a “Testopia” sub directory.

Step 10.3 Execute “perl checksetup.pl” to install the testopia extension
C:\>bugzilla-4.2.1>perl checksetup.pl
Note: If mandatory Perl modules are missing, ensure they are installed before going to the next step
Step 10.4 Restart Apache Server
C:\>net stop apache2.2
The Apache2 service is stopping.
The Apache2 service was stopped successfully.
C:\>net start apache2.2
The Apache2 service is starting.
The Apache2 service was started successfully.
Step 10.5 Clean up Perl modules. Execute the following dos command prompt:
C:\>ppm uninstall MinGW
11.0 Verify Testopia is installed and working
Step 11.1 – Using browser, navigate to http://localhost/
Step 11.2 - Click Login link

Step 11.3 - Type in Bugzilla Admin Login (Email Address) and Password and click Log In Button

Step 11.4 – Verify Testopia installation is successful by ensuring Product Dashboard row displays on website.

2 comments:
Thanks !! A very handy reference
very helpful, thanks
Post a Comment